It has been a while since last post on my website, almost a year! A busy married life. Anyway, the new USB-C Charging Kit PRO for Game Boy Color is almost completed after having many “out of stock” problems with the components I wanted to use. I just hope between I receive the test board, solder it and order a batch in the manufacturer… they still have the components I need. I will write more details about it in the corresponding post.
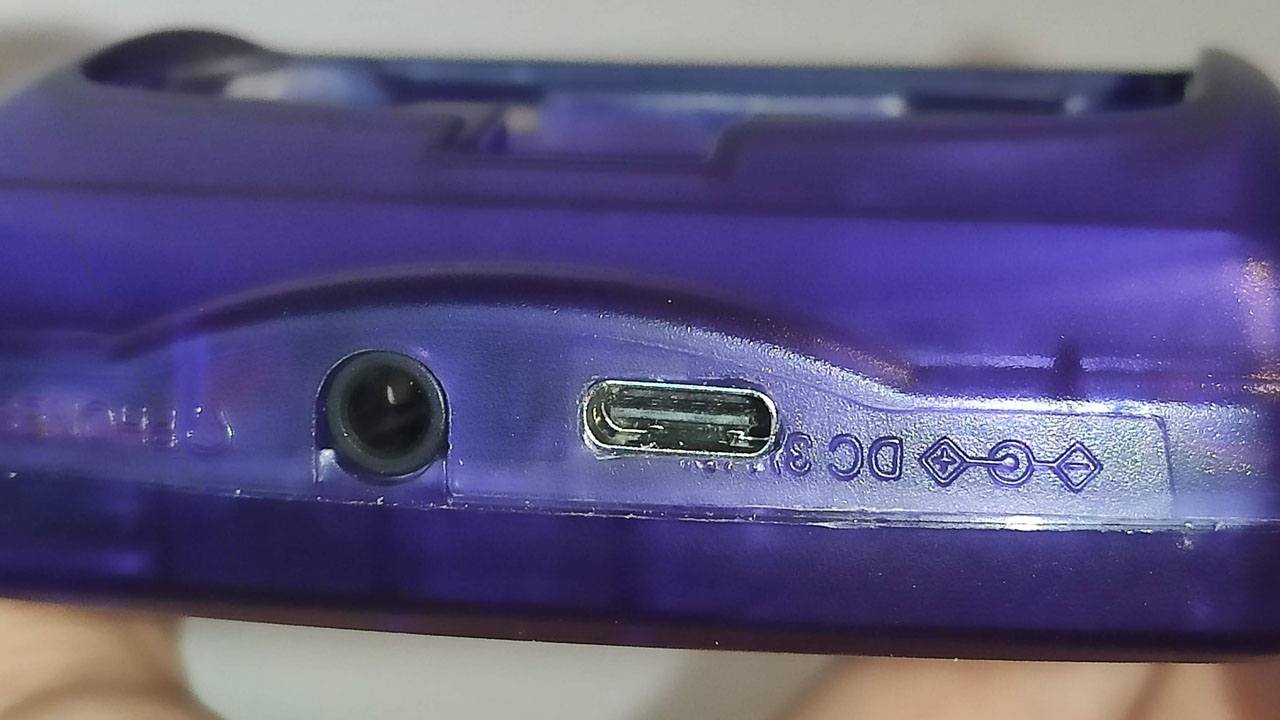
During this year selling the charging boards for GBP and GBC some people asked me about any tool or advice to make a perfect hole in the plastics shell for the USB-C connector. Making this is a bit hard, you need good tools and also a knowledge about cutting plastic. When I made it the first time it was not bad at all, however it was far away to be perfect, many people had the same result or worse with a big big hole.
I spent time thinking how to solve this problem. I finally I reached the conclusion that the best way was making a plastic tool which control where you must cut the plastic and where you must not cut it! It is basically a plastic template which can be screwed to the plastic shell and then you just need to put the Dremel with the drill tip in the hole and move it around the template.
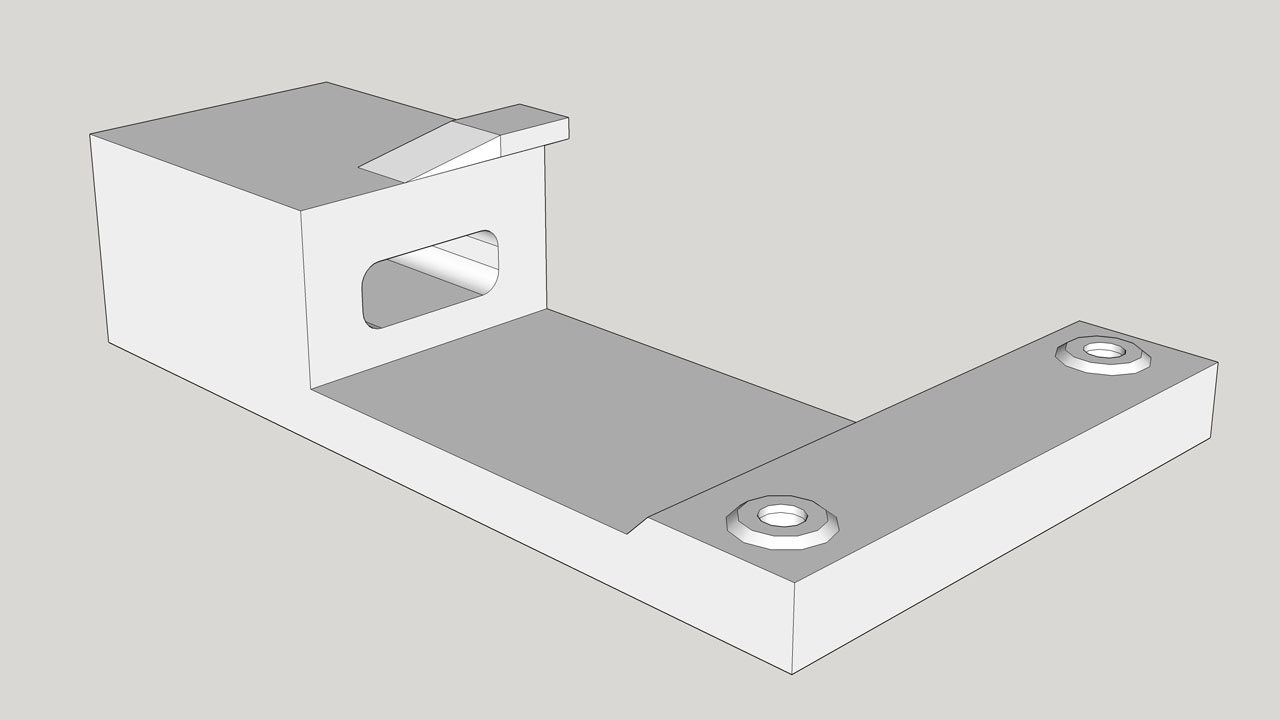
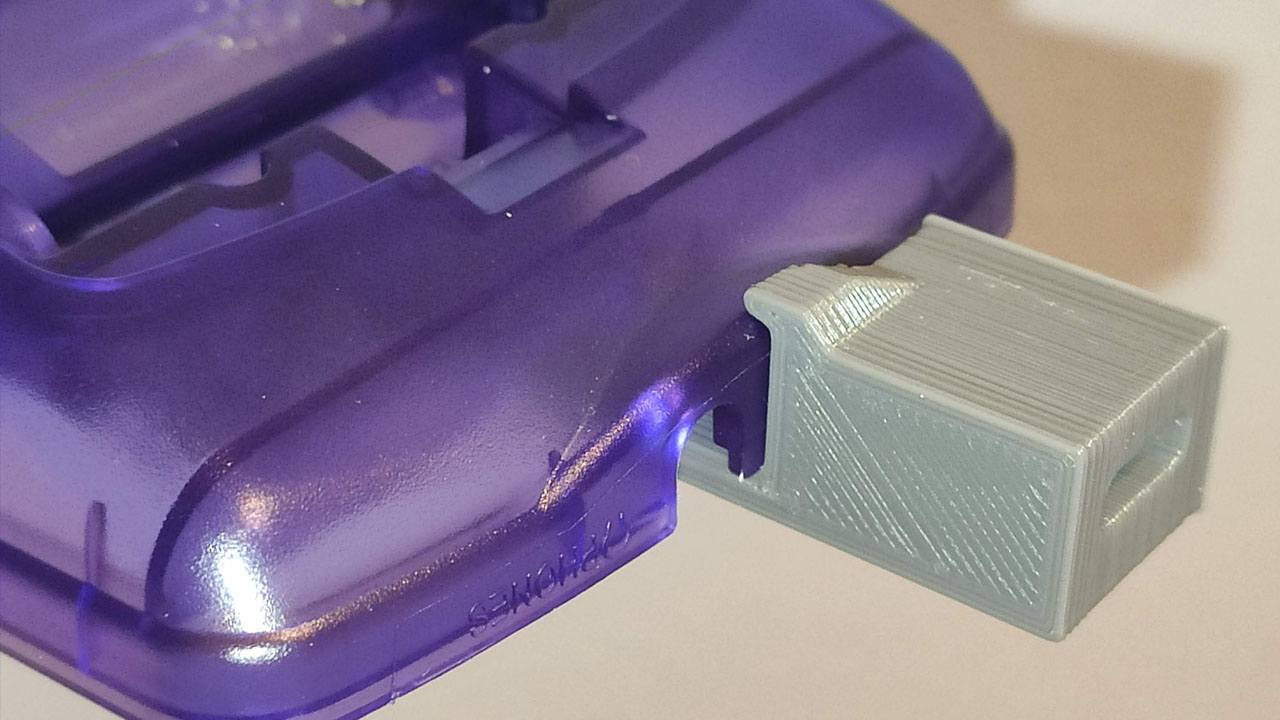
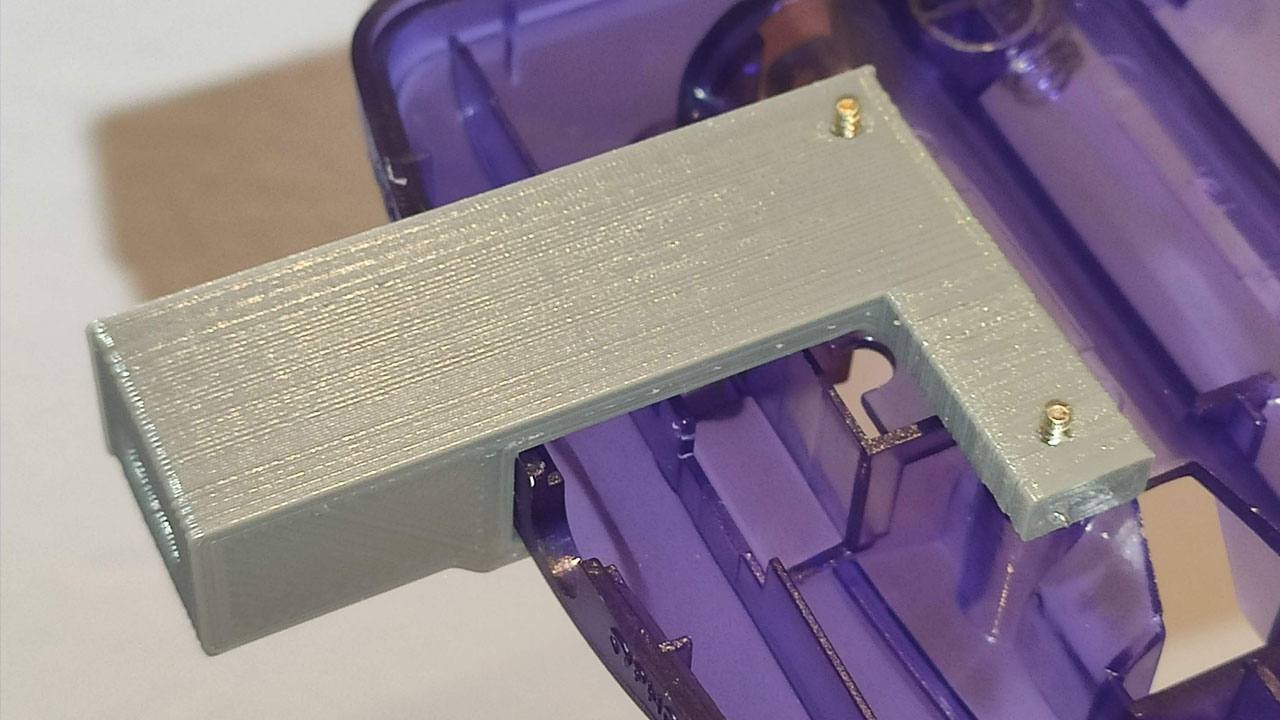
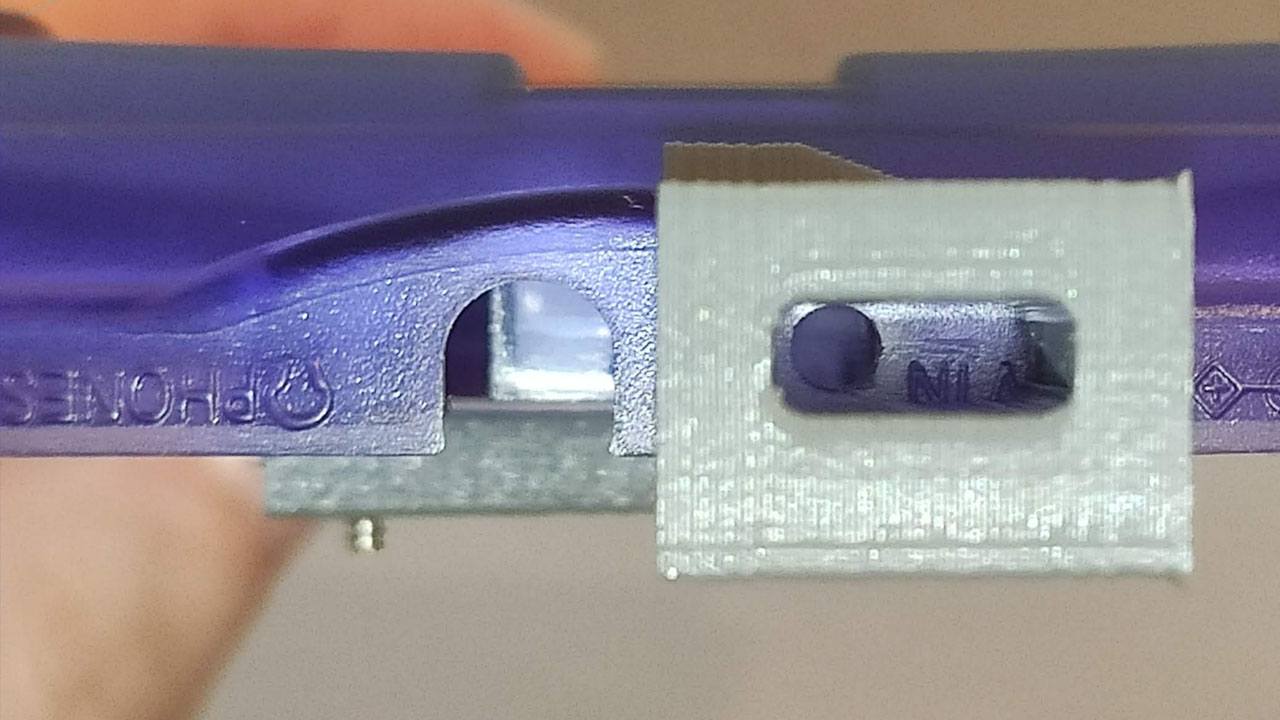
The result should be something like the following picture:
I’m still thinking if include it with each GBC Pro Kit, or sell it separate or what. To be honest I wouldn’t like to have the printer printing all day (it’s hot and noisy) and I don’t think people who want more than one kit will need more than one tool, I think it can be reusable.
If you also have a 3D printer, you can print it, the file is available in the repository:
GitHub
Edit:
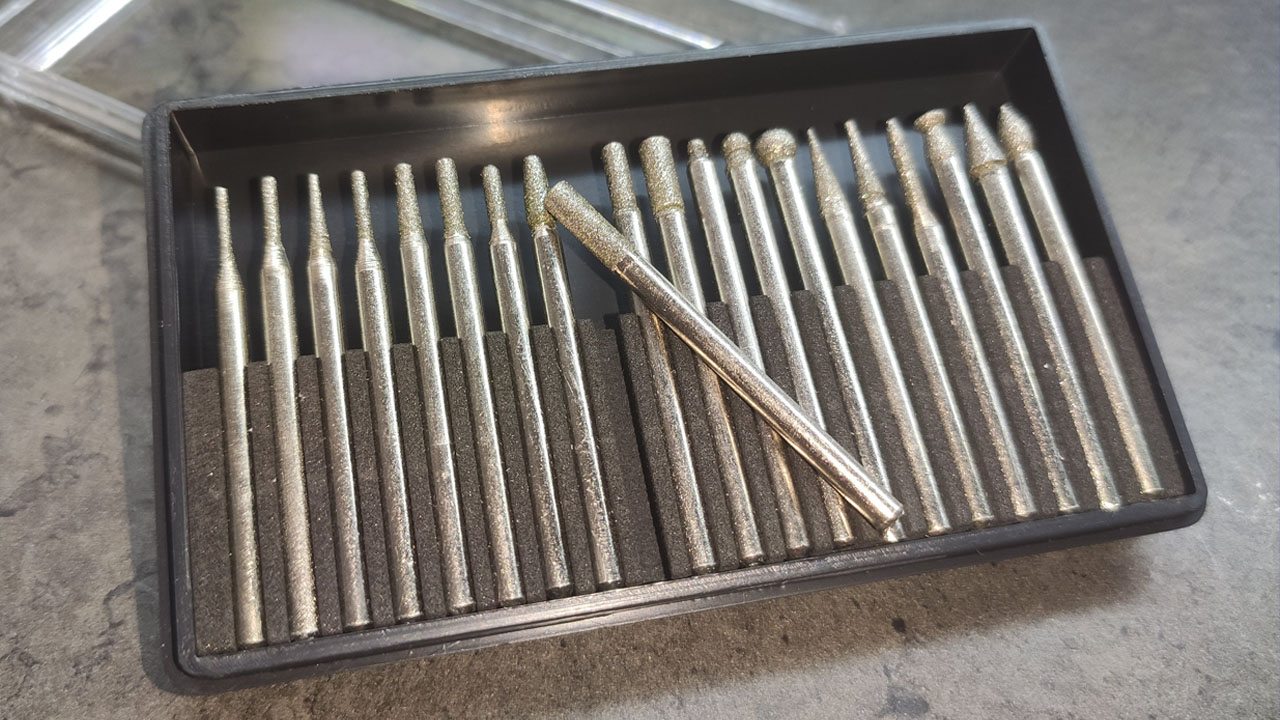
When I made the video, I didn’t have diamond burs like these ones. I think it can be better to make the hole in the shell but without destroying the plastic template at the same time. If I make another shell, I will record it and upload here.
link broken 🙁
Thanks, I fixed it!