[notification type=”alert-info” close=”false” ]The content of this page is going to be removed since everything is published and updated now here: https://shop.giltesa.com[/notification]
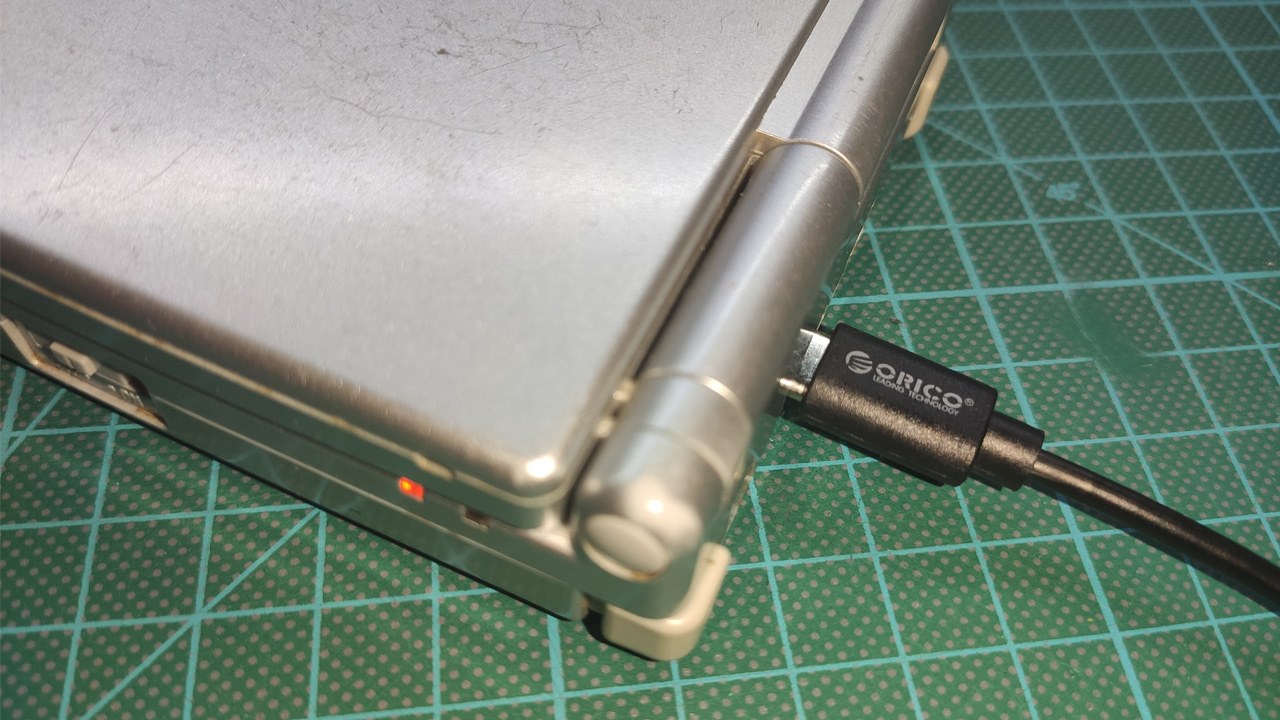
This project started when I wanted to make my own electronic board for using a li-ion battery instead of AA batteries and charging it by USB-C in my Game Boy Color.
However, many people were extremely interested in it and I finally decided to make more boards for GBC and also for other Nintendo video games. You can see here which boards I made.
Game Boy Color (CGB-001)
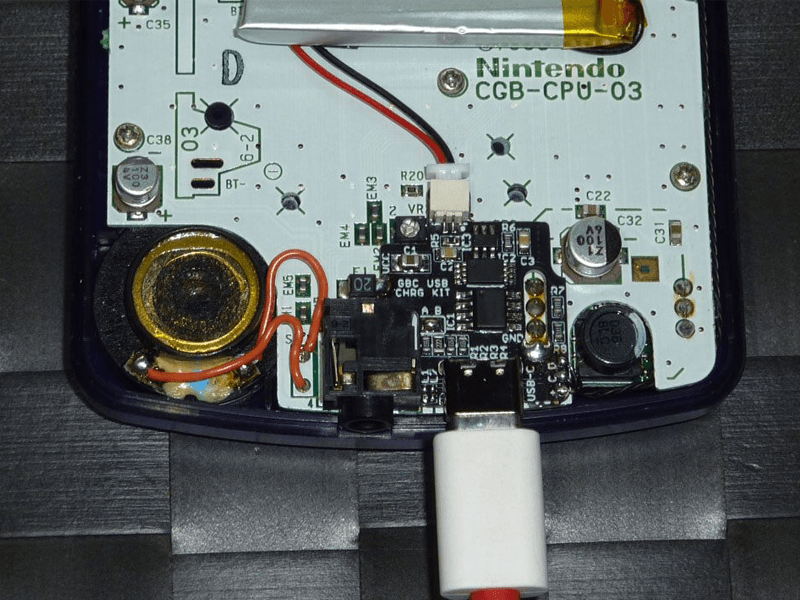
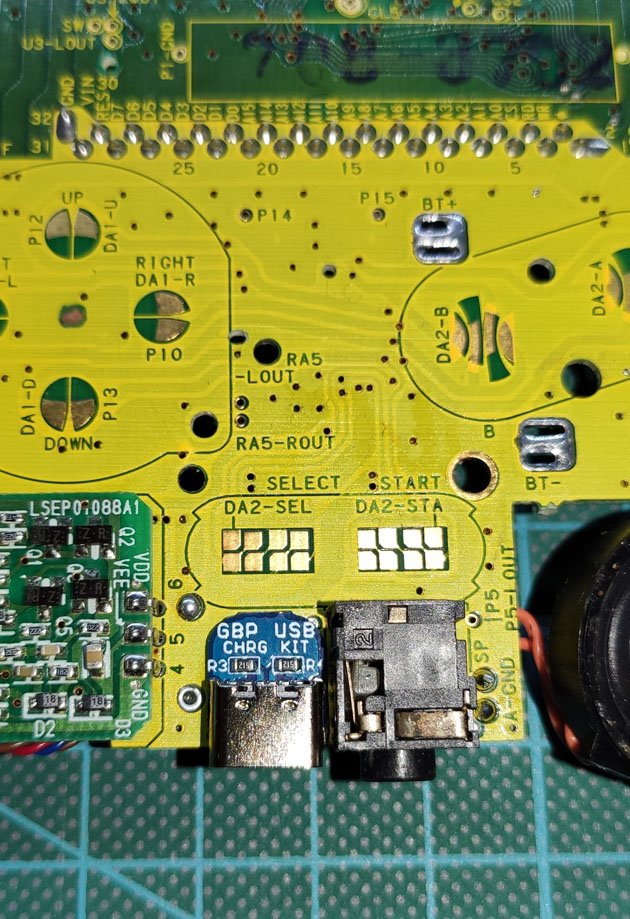
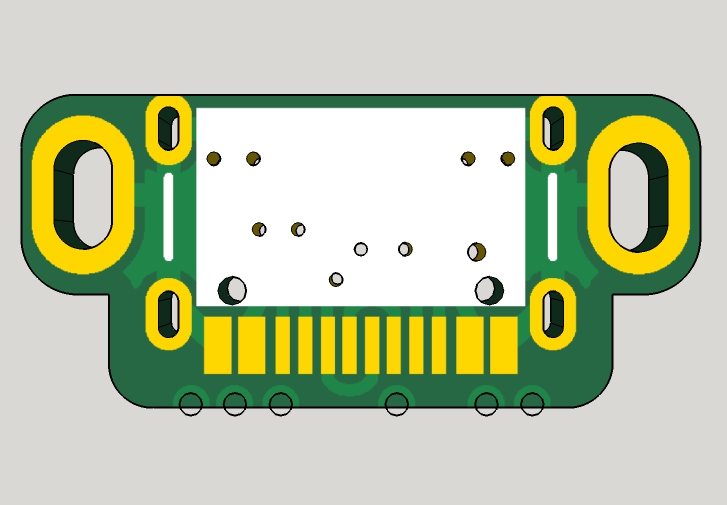
The Game Boy Color USB-C Charging Kit is a circuit that allows you to charge a Nintendo Game Boy Color by USB-C and use a Li-ion battery instead of AA batteries.
This circuit includes the famous TP4056 and DW01A. The first one is the device in charge of charging the battery, and the second one is protecting the lifetime of the battery of the over-discharge.
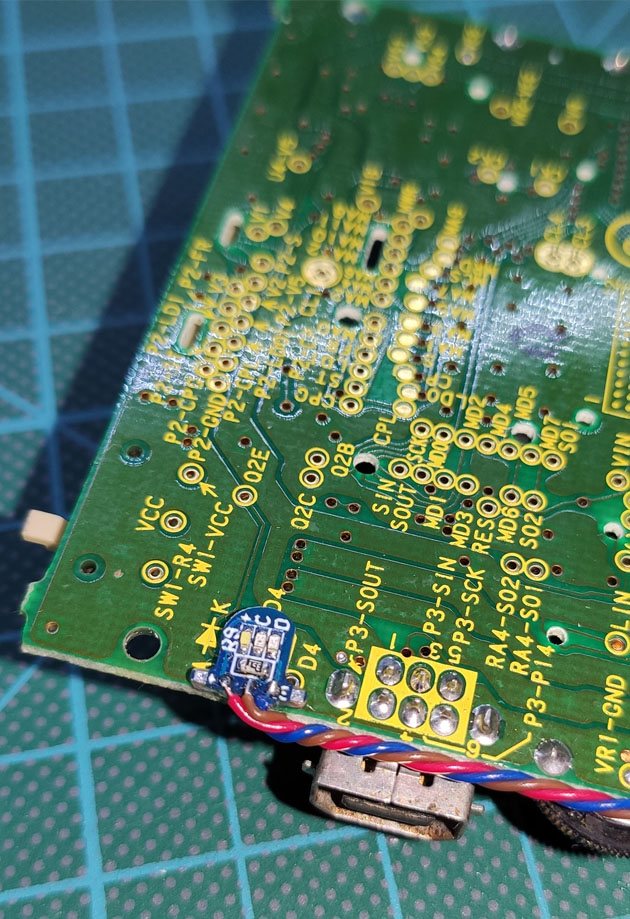
This kit includes two boards. If you want to install it easy, it’s enough with the main board which doesn’t need any cable for working. However, if you want to have the status LEDs in the same place as the original status LED, then you will need to solder the second board and joint both with 3 cables. You can choose the best option for you.
This kit includes:
1 board which includes the charging and light board.
1 Battery cable.
1 Cable of 3 wires for connecting the light board.
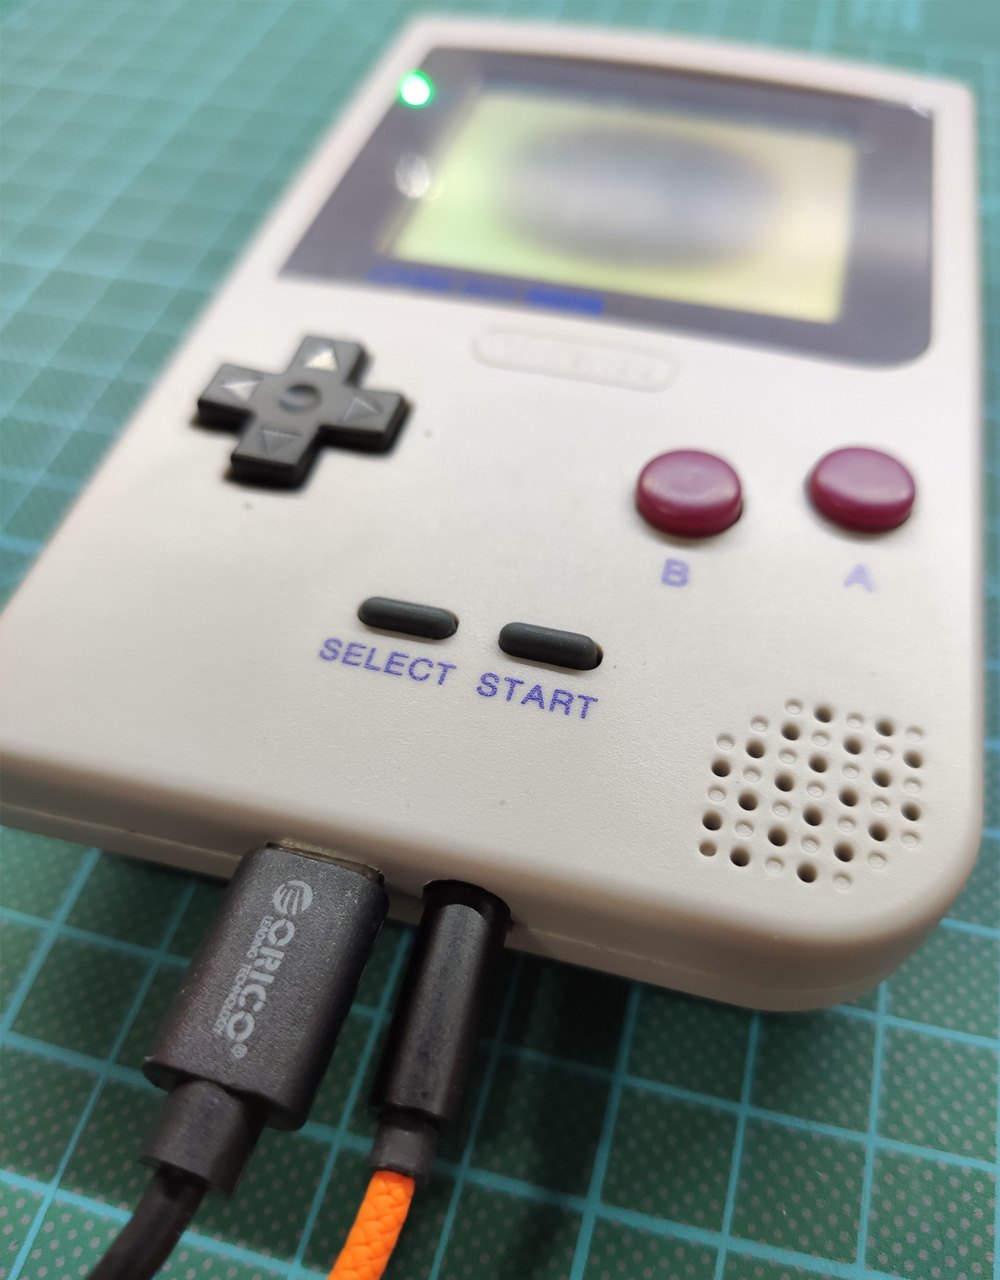
Can I play and charge the battery at the same time?
The electronic board doesn’t have any circuit to support it, however, you can do it. I have tested it with my GBC and works well (maybe if you battery is less than 5% of charge your GBC can not turn on, wait a minute and try again)
Can I use this board with others boards? You can do it as long as the board you want to install is compatible with the voltage supplied by this board. Remember it can be between 2.75 to 4.2V, for example, this modules work great:
Pololu 5V Step-Up Voltage Regulator U1V10F5 (link)
The speaker or/and headphones make noise with the USB-C charging kit.
There are some conditions that can do the GB makes noise. For example, if your GB power regulator is too used/old, or you have installed an IPS screen that drains too much energy, etc. you can have this problem.
You can solve this in most of the cases replacing the original power supply for other compatible (the input voltage must support between 2.75 to 4.2V)
Changelog (updated on 2022/06/10)
2020-09: v1.0:
Initial version, it has never made.
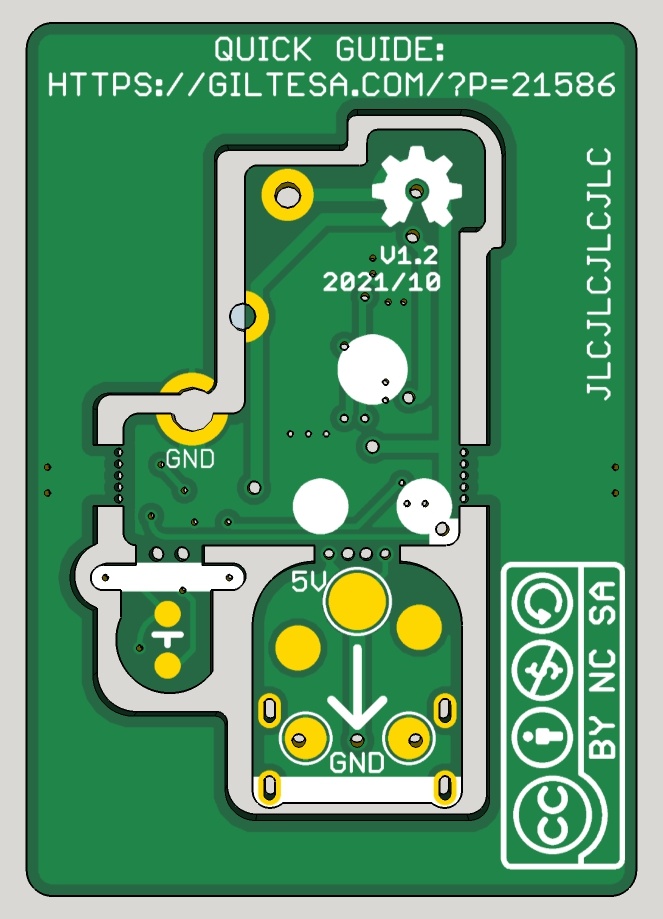
2021-02: v1.2:
First version of the board.
2021-03: v1.3:
Added frame for panelize the circuit.
Added lights in the main board.
2021-04: v1.4:
Removed voltage jumper selector for charging battery. (It will charge at 1A)
2021-05: v1.5:
Simplified how to separate the boards from the frame.
Added GBC logo.
Added a light diffuser.
2021-10: v1.6:
Reduced the pads width of the battery connector in 8 mil.
Modified the fount of the “GBC USB CHARGING KIT” text.
Added a 5V pad to solder an alternative input, for example a Qi charger.
2022-02: v1.6 (February):
The LEDs manufacturer has changed because the out of stock. The new green LED is a brighter than before. If this is too much for you, try to put translucent tape over the green LED (between the LED and the light diffuser).
2022-05: v1.6 (May):
New green light with less brighter than before, but the color it’s a bit yellow, like lime color.
2022-06: v1.6 (June)
New green light with less brighter than before, but the color it’s a bit yellow, like lime color.
Modified the letter logos to avoid any complaint.
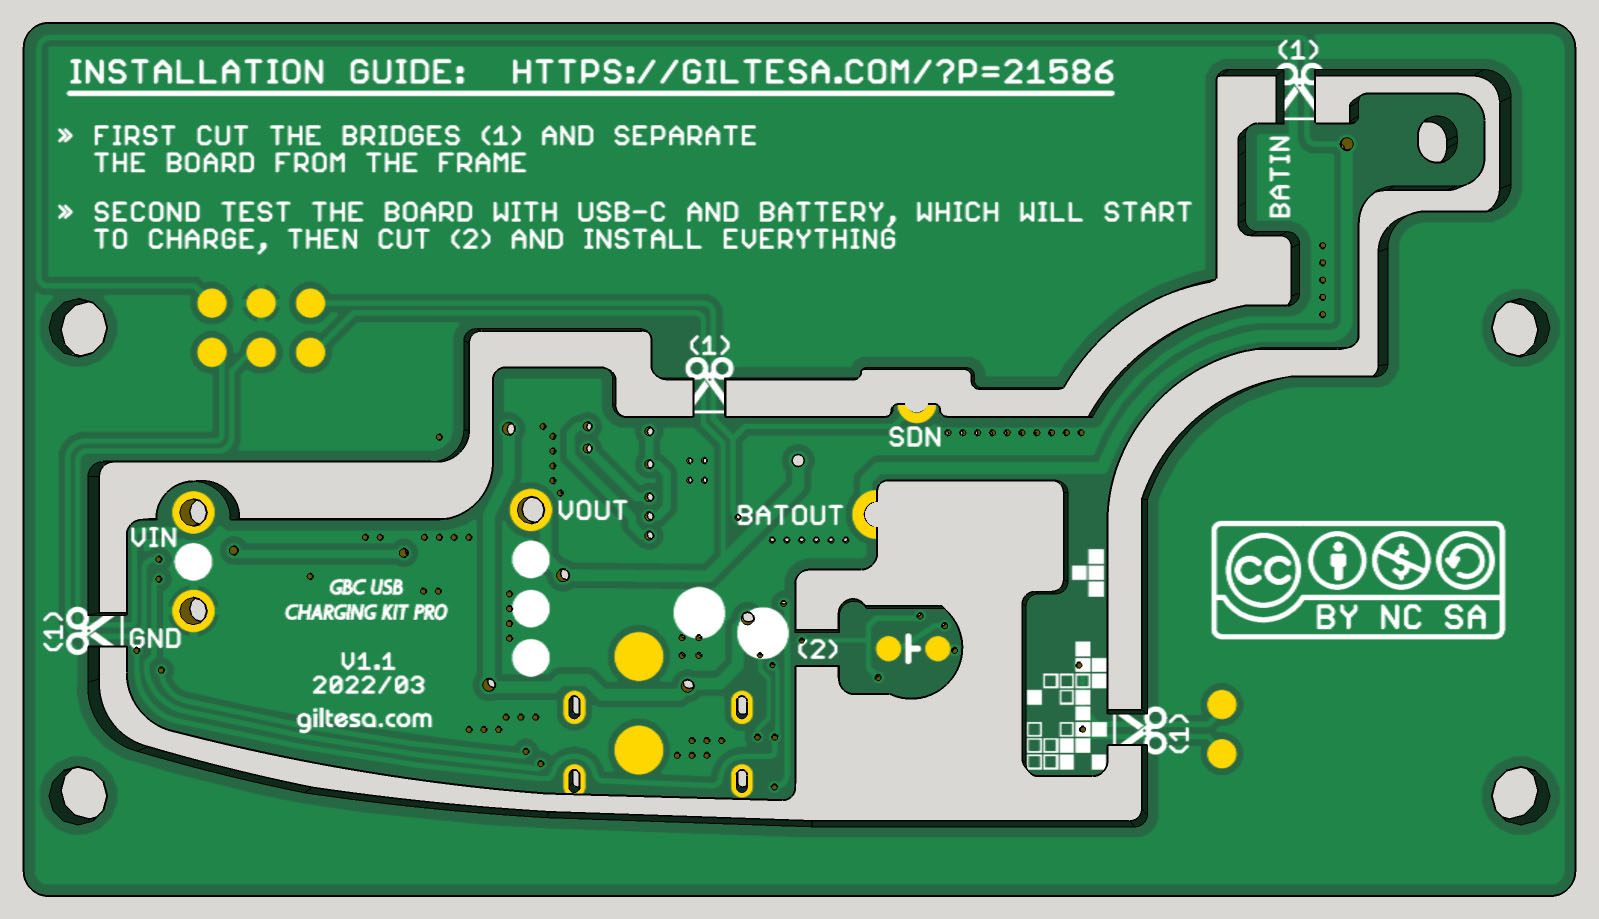
Game Boy Color (CGB-001) - PRO
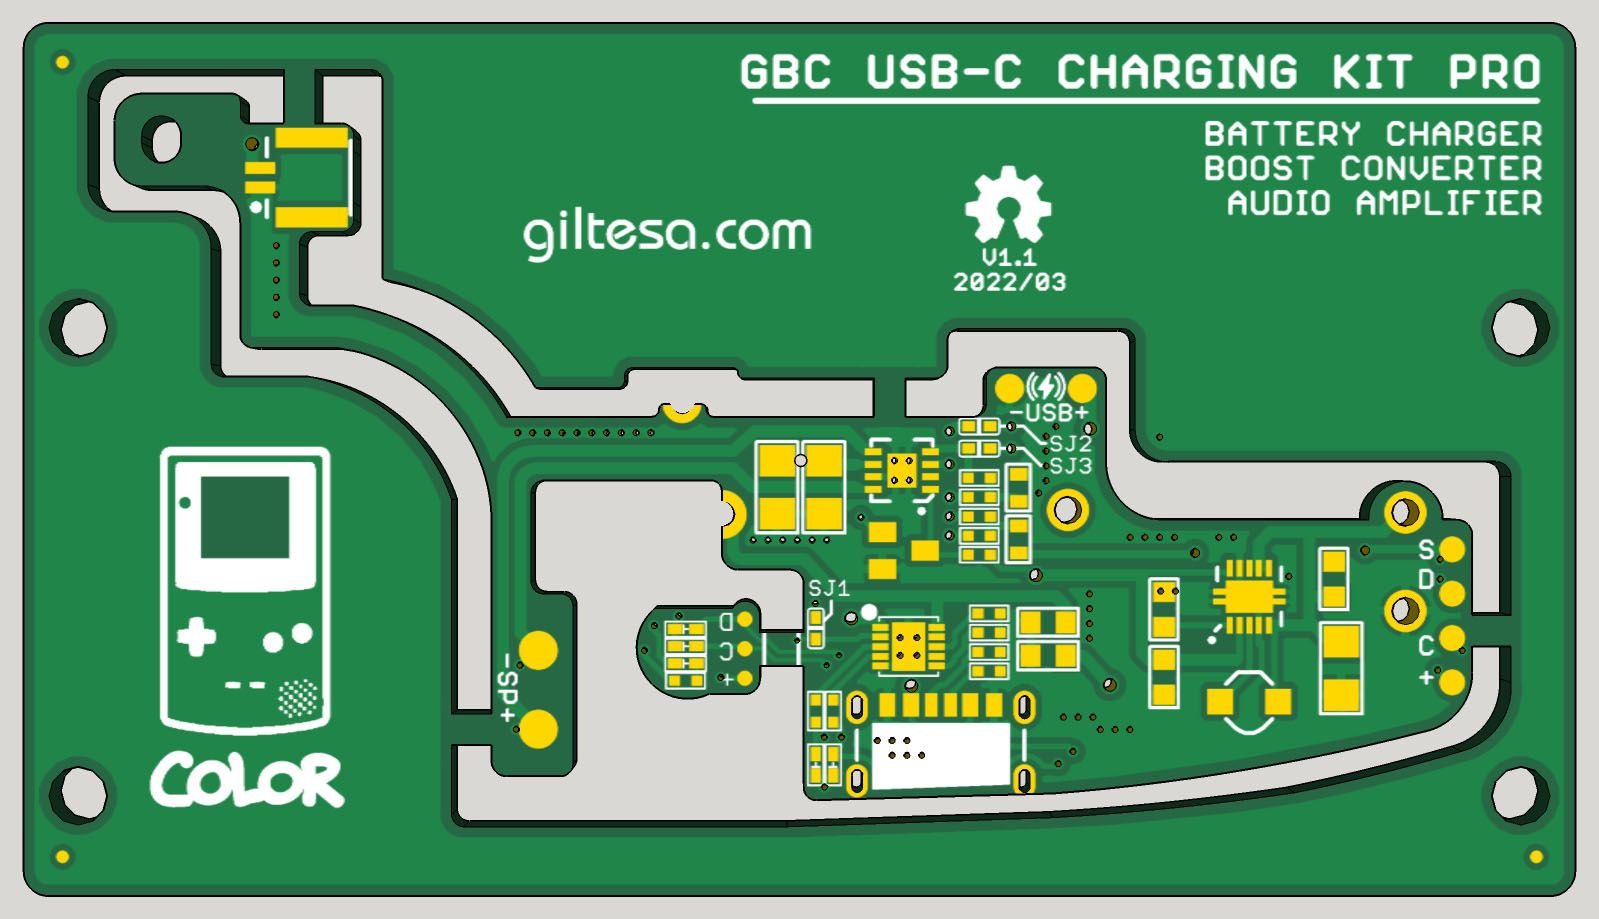
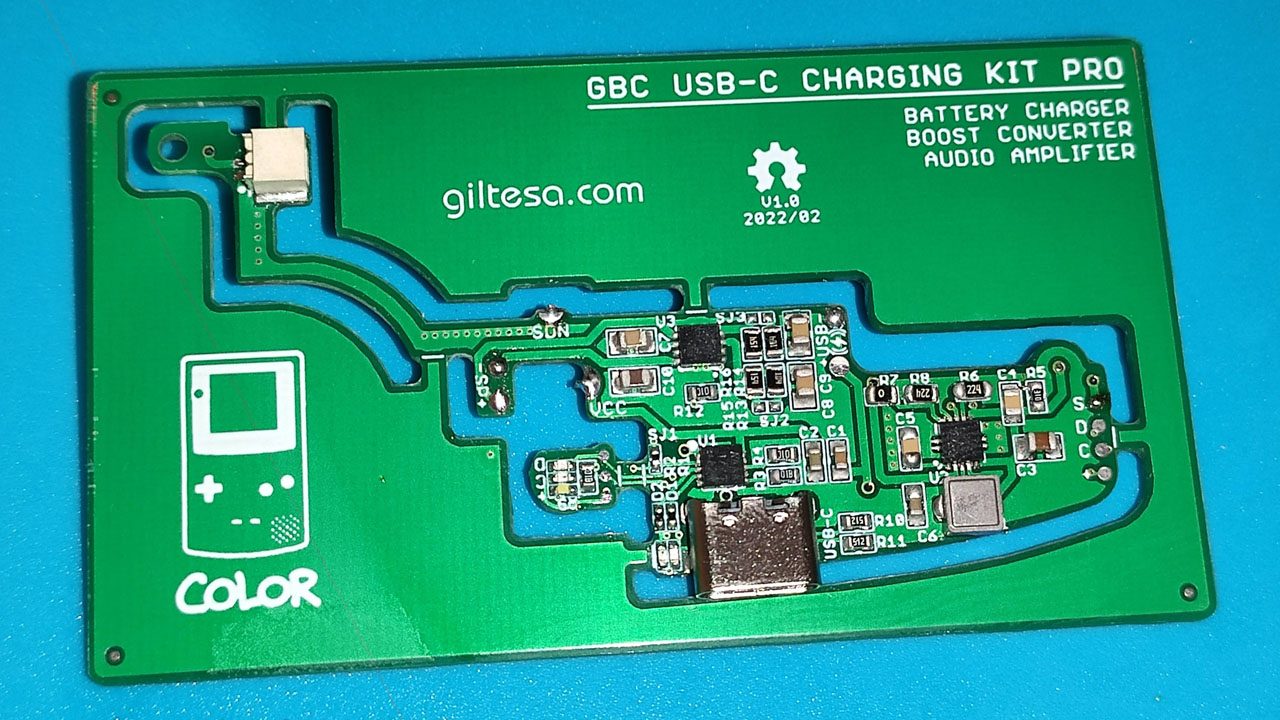
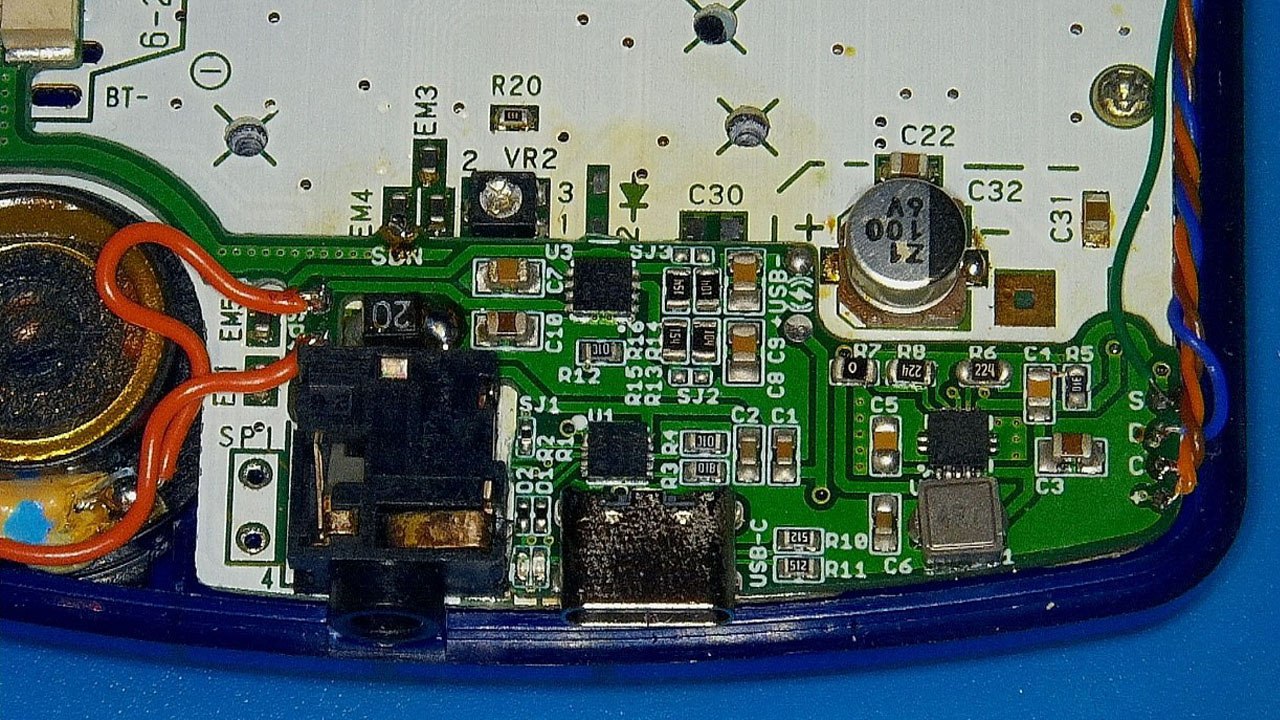
The Game Boy Color USB-C Charging Kit PRO is the new circuit for Nintendo Game Boy Color. This time is all in one circuit and includes not only the charging controller but also a boost converter and audio amplifier.
The modern IPS displays with background light require more energy than the stock display. Also, the flash cards to load tons of games consume the battery very fast. If you really want to enjoy the games, the best way to do it is using a li-ion battery instead of AA batteries.
However, that is not enough because a higher consume is forcing the original electronic to strive more than it can. That may cause noise in the speaker or headphones.
Typical solution has been adding a charging circuit for the battery and a power converter to replace the old and not efficiently one which is included in the GBC. Some people also add an audio amplifier to hear better the speaker sound. All these things make the GBC perfect, however the installation require a lot of cables and can not be easy for some people without enough knowledge.
Game Boy Pocket (MGB-001)
Game Boy Light (MGB-101)
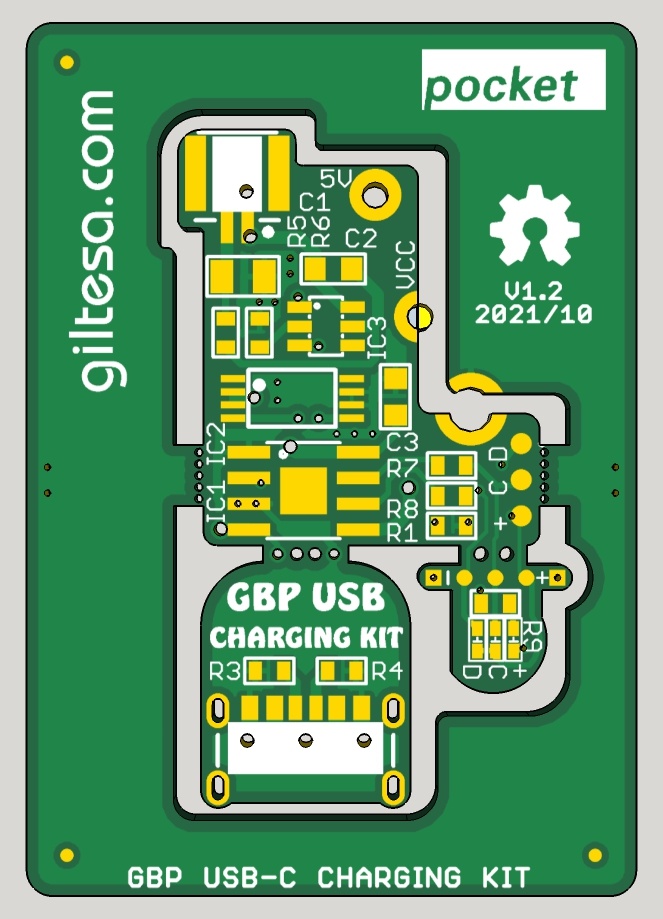
This Game Boy Pocket USB-C Charging Kit is the same as the Game Boy Color board but customized for Game Boy Pocket.
Because the Nintendo main board has less space, it has required a special board which include 3 boards:
Main board: Include the electronic components for charging and controller the battery over-discharge.
USB board: It is just the USB.
LED board: include 3 lights which are: White when GBP is power on, red when is charging and green when it has finished to charge. This board has been modified to support the GBP without status LED, you can get this functionality and replace your GBP case for another with LED hole.
This kit includes:
1 board which includes the charging, USB-C, and light board.
1 Battery cable.
1 Cable of 3 wires for connecting the light board.
1 Light diffuser
2 Small cables to connect the power on LED if your model doesn’t have a red LED.
There are many version of the GBP mainboard, this kit is compatible with:
MGB-ECPU-01
MGB-LCPU-02
It’s not compatible with:
MGB-CPU-01
PS: This board should be usable in the Game Boy Light as well, because both boards have almost the same size, but I haven’t try it so I can’t guarantee you can use it in this model.
Can I play and charge the battery at the same time?
The electronic board doesn’t have any circuit to support it, however, you can do it. I have tested it with my GBP and works well (maybe if you battery is less than 5% of charge your GBP can not turn on, wait a minute and try again)
Can I use this board in a Game Boy Pocket without LED
Yes, the light board include two pads on the top side where you can solder two extra cables to join it to some place on the GBP board. However, I don’t know yet where it’s the best place for soldering it and if it will require a resistance. (or change the resistence that includes the light board for another one)
The speaker or/and headphones make noise with the USB-C charging kit.
There are some conditions that can do the GB makes noise. For example, if your GB power regulator is too used/old, or you have installed an IPS screen that drains too much energy, etc. you can have this problem.
You can solve this in most of the cases replacing the original power supply for other compatible (the input voltage must support between 2.75 to 4.2V)
Changelog (updated on 2022/06/10)
2021-04: v1.0:
Initial version.
2021-05: v1.1:
Increased the size of the USB PCB, so that the USB connector sticks out a bit more.
Simplified how to separate the boards from the frame.
Added GBP logo.
2021-10: v1.2:
Increased the size of the USB PCB, for keeping the whole USB holes and solder it a bit stronger.
Reduced the pads width of the battery connector in 8 mil.
Modified the fount of the “GBP USB CHARGING KIT” text.
2022-02: v1.2 (February):
The LEDs manufacturer has changed because the out of stock. The new green LED is a brighter than before. If this is too much for you, try to put translucent tape over the green LED (between the LED and the light diffuser).
2022-06: v1.2 (June):
New green light with less brighter than before, but the color it’s a bit yellow, like lime color.
Modified the letter logos to avoid any complaint.
Game Boy Advance SP (AGS-001)
Game Boy Advance SP Backlight (AGS-101)
Nintendo DS (NTR-001)
Because the Nintendo Game Boy Advance SP video console include a li-ion battery, this board just has the USB-C connector and two resistors.
Unlike the GBC and GBP, this board allow you charge the battery and take out the audio with a USB-C earphone (or use them with a USB-C to jack audio adapter)!
However, this board it’s extremely small and you will need to solder 6 small pads. So, it can be a bit difficult. I will try to make a video explaining how to do easier.
This kit includes:
1 board.
1 plastic cap to cover the hole (3D Printed bezel).
PS: This boards should be compatible with Nintendo DS as well, because it has the same connector as GBA SP.
EDIT: USB chargers with cable USB-C to USB-C may NOT work because the board doesn’t have the resistors. I’m investigating again if there is any way to keep the resistors and don’t lose the audio.